

1) How to diagnose the exact component failure on the faulty motherboard?
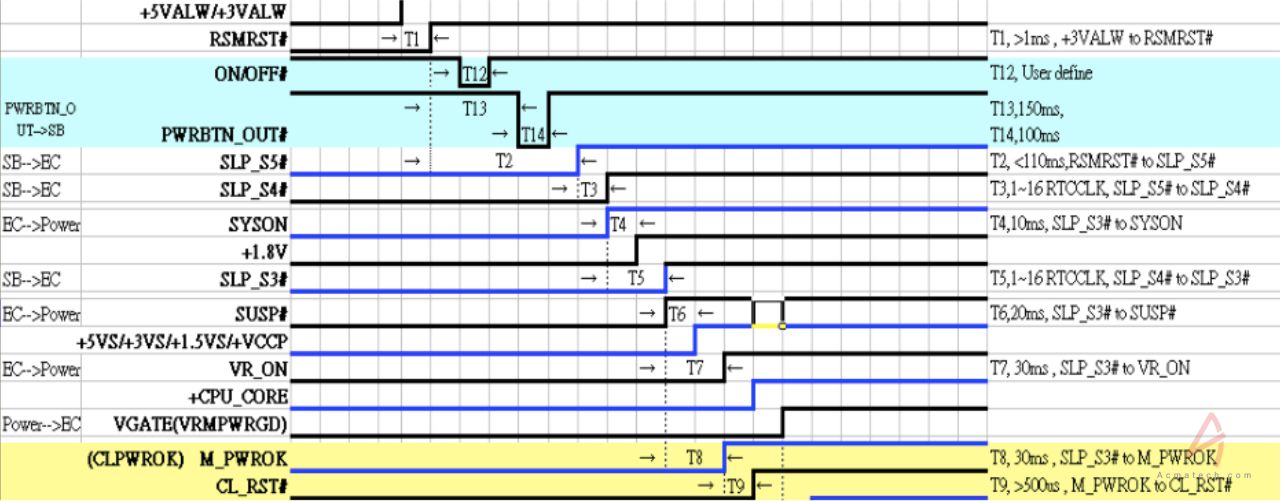
Obviously, a burn mark is a dead give away sign, but what to do if there are no visual signs? Do you poke around with a multimeter? With what voltage settings and how do you know what to look for ? For the same you need to know the power sequence of the motherboard, it will help you to find out the missing voltage on the motherboard.
2) Is it usually a bad capacitor or its a circuit shorting ?
Bad capacitor seems to think so when it usually beeps with ground . Typically each and every capacitor in laptop motherboard is for filtering or coupling purpose, but if it seems to be giving beep sound with the ground we need to check the sequence of that particular section to find out the root cause as most of the times its because of bad connection/ circuit shorting.
3) How to perform the component level repair?
So you’ve found the bad capacitor or component on the motherboard, so now you need to solder a new one without tampering the components around them . Always use good tools for soldering purpose to avoid issues.
Smart tips to Diagnose motherboard problems:
Typically to diagnose a motherboard fault needs bit experience, but if you have patience and the basic electronics knowledge , you can definitely find out the solution . Basically, we measure voltages on motherboard and there are few power supply range from 1V to 12V on the motherboard. For example, north bridge needs 1.05V, 1.2V, 1.5V, 1.8V, 2.5V, depends on generation of north bridge.
We also need to measure all sort of signals, such as PCIRST, CPURST, CLK. We measure the resistances of each AD line from north bridge to CPU/RAM to check the sequence and bad contacts.
We need to get into the voltage flow before and after triggering as per the power rail of the particular motherboard or as like a typical working of a motherboard.
There are some simple steps to follow while checking a notebook motherboard:
About Bad Capacitor
It happens rarely but needs smart capabilities as it needs patience to find out the faulty /short capacitor on the motherboard, as typically faulty capacitors behavior can be changed on cold /hot testing ( Means sometimes it will give direct beep and sometimes it will be short but will never give direct beep)
Loose connection
Mostly happen on VGA chips, south bridges and the places close to CPU ( All areas where more heat generates while running). Bit touch to troubleshoot and need lot experiences.
Advised tools to repair a motherboard?
You need specialized tools. First of all a DC power supply which can display current change and set to different voltage and current output. You need good soldering station, SMD rework station, BGA rework station, multimeter etc. Schematic diagrams are available on internet – you need to spare some time to search it.
For any questions /concerns /suggestions – Please Call one of our Faculty @ +91 922 222 8383.
You must be logged in to post a comment.